Our most powerful feature is the Schedule tab where you can quickly see how many team members are working each day, as well as create shifts and events for your staff. This is a basic overview of how to navigate and use its features. You are always welcome to chat with us by clicking the chat icon in the bottom right-hand corner of any screen in Nursegrid Manager to ask additional questions.
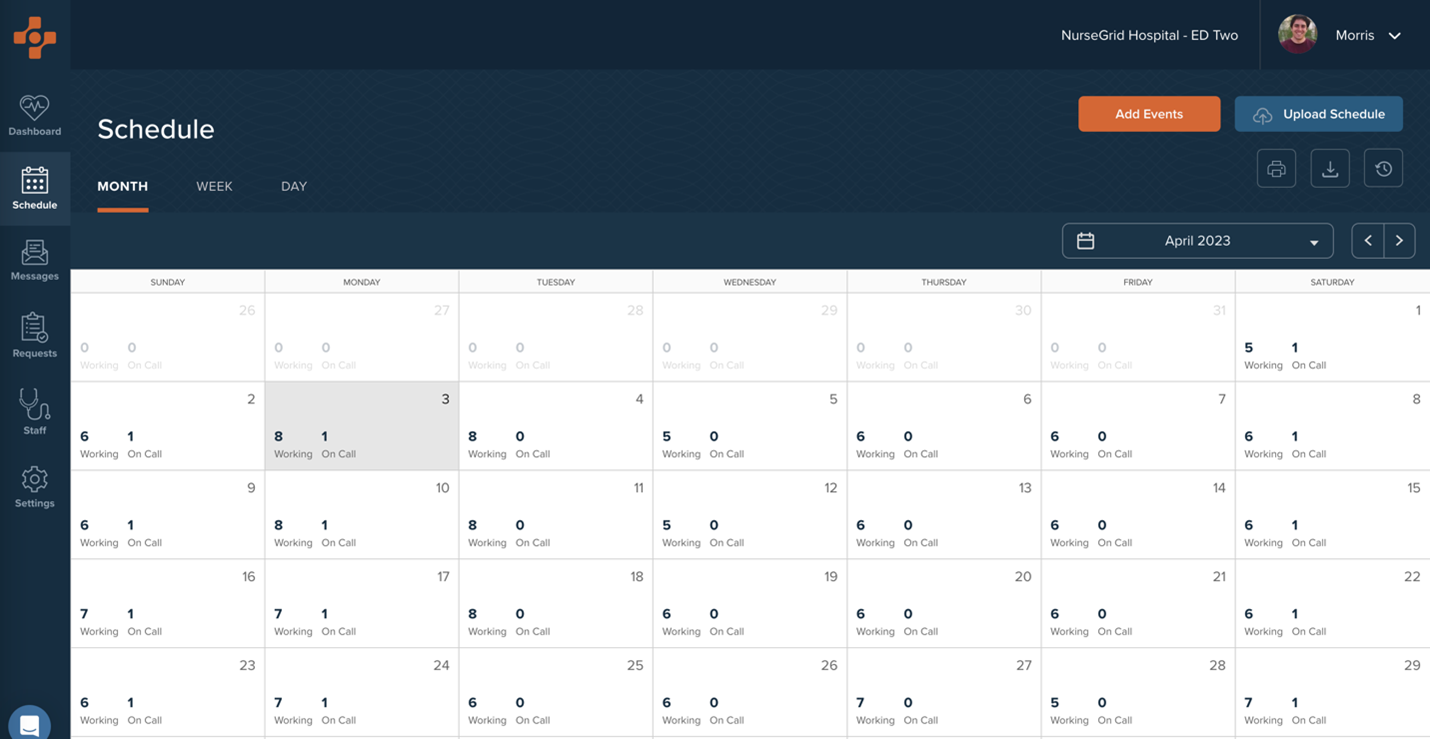
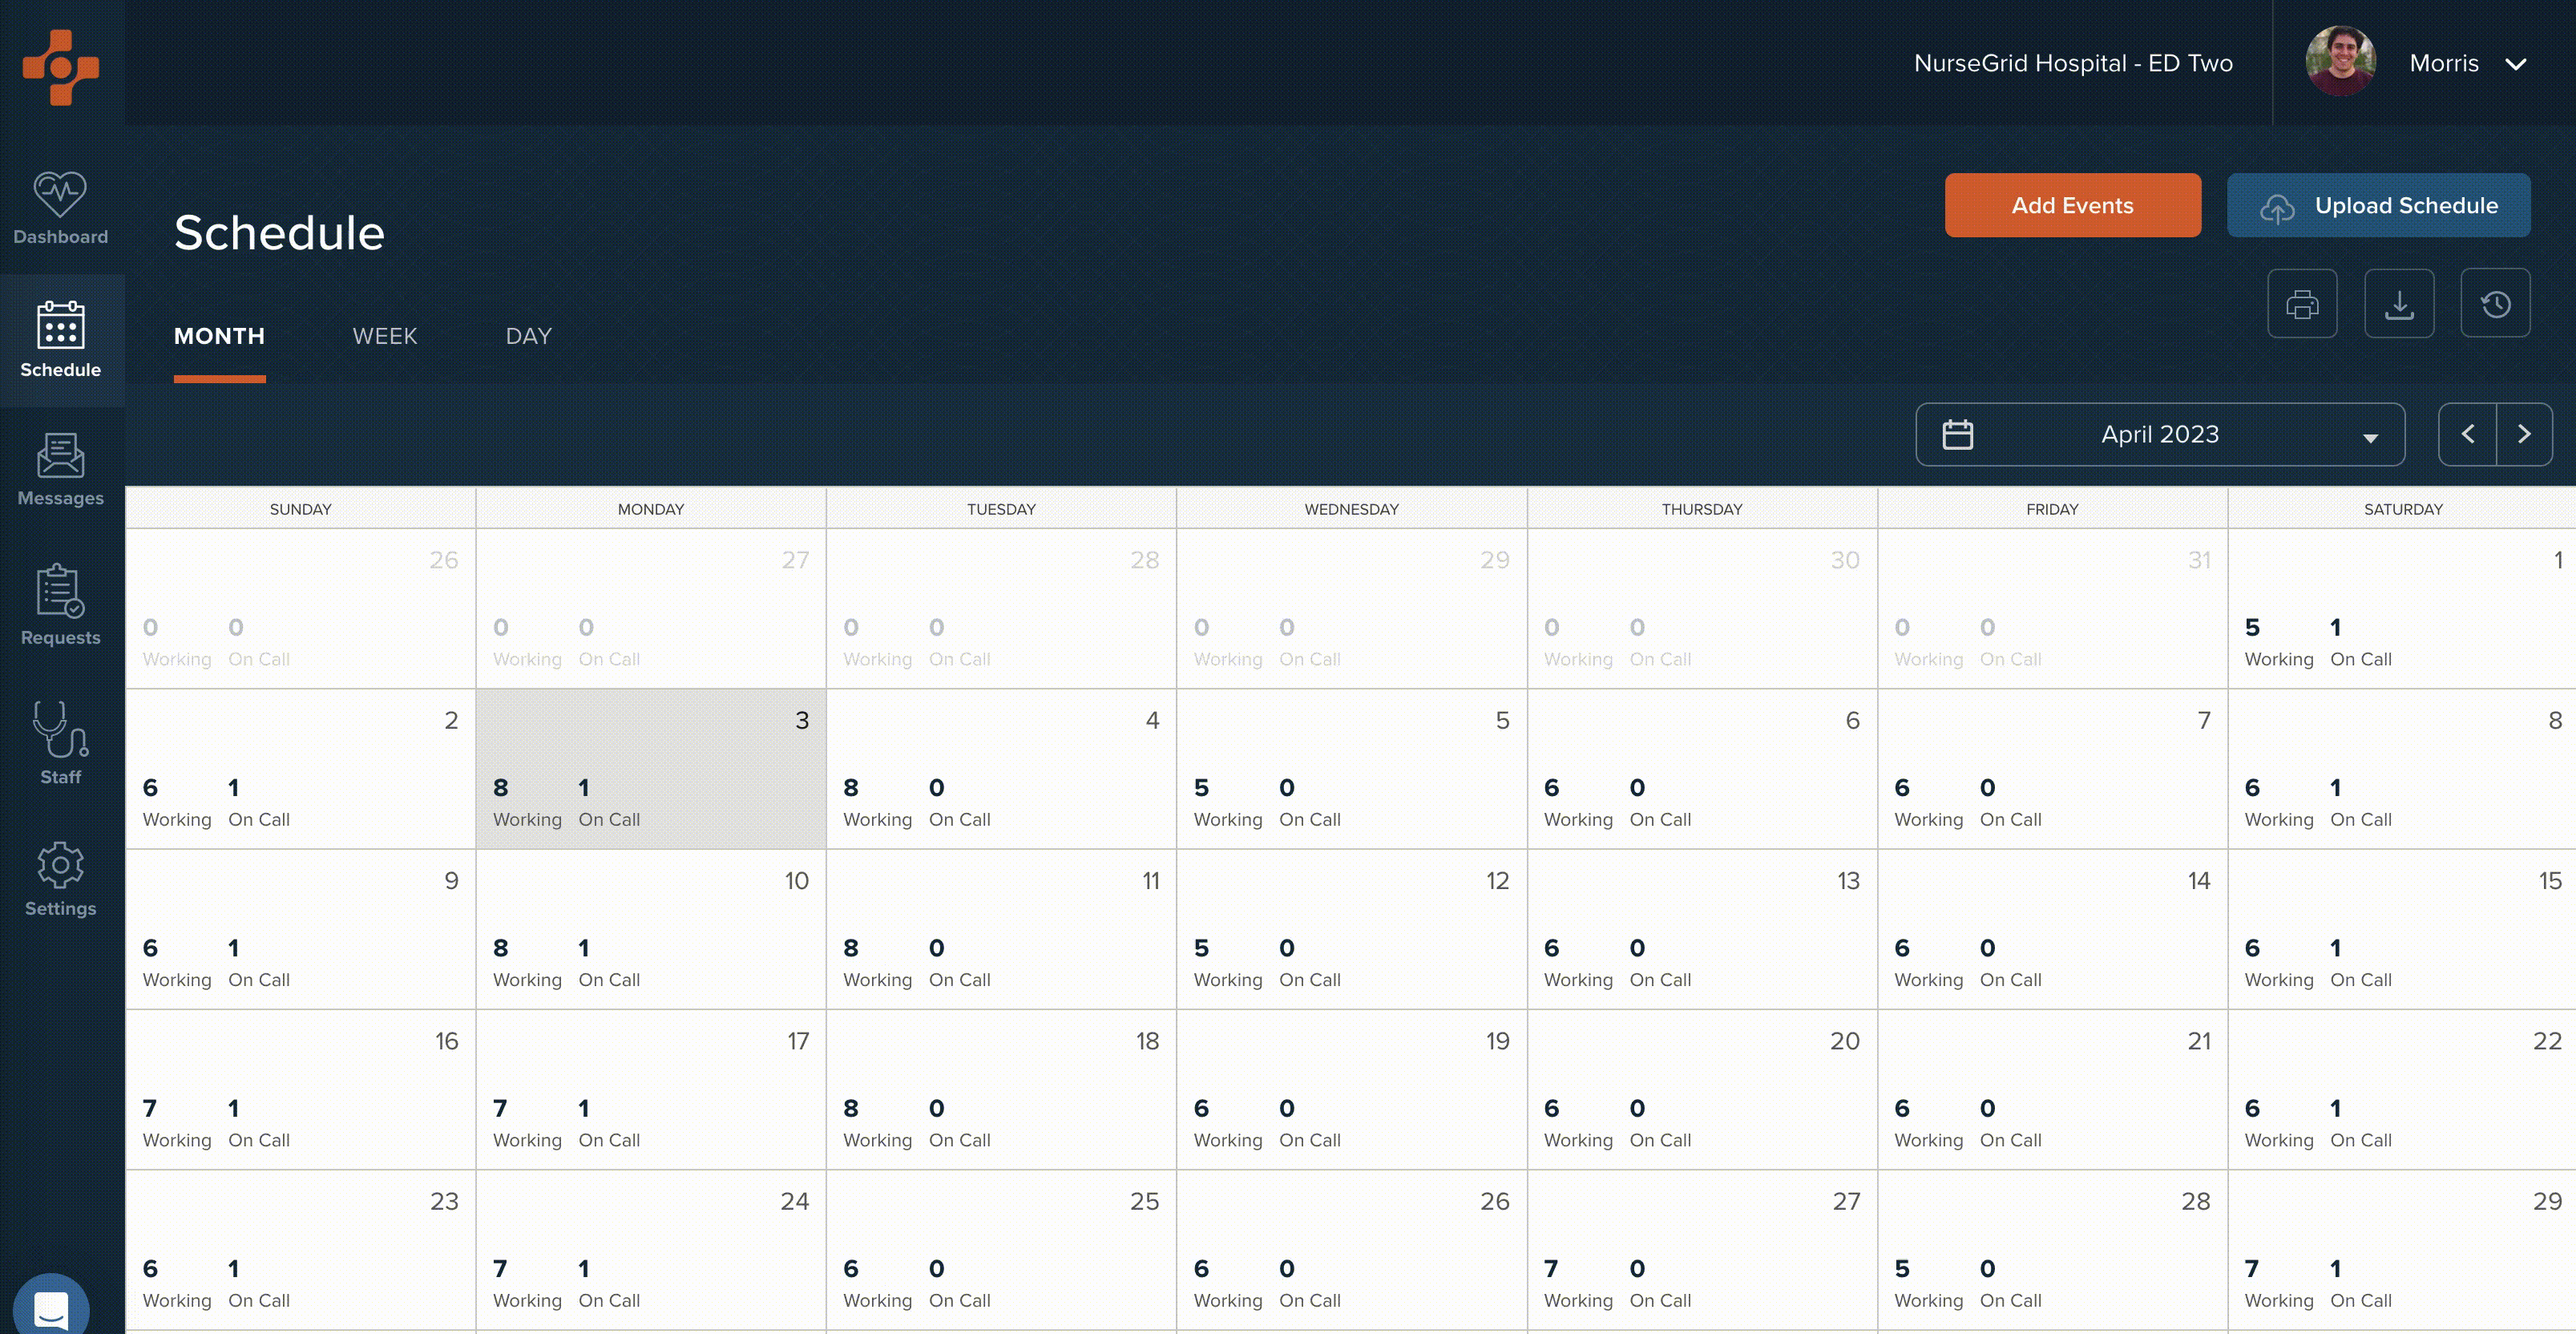
You can view how many team members are working each day in the Month view or click any date to see that day’s breakdown by position, shift and number of staff. The shifts will be color coordinated according to the shift types you’ve already setup!
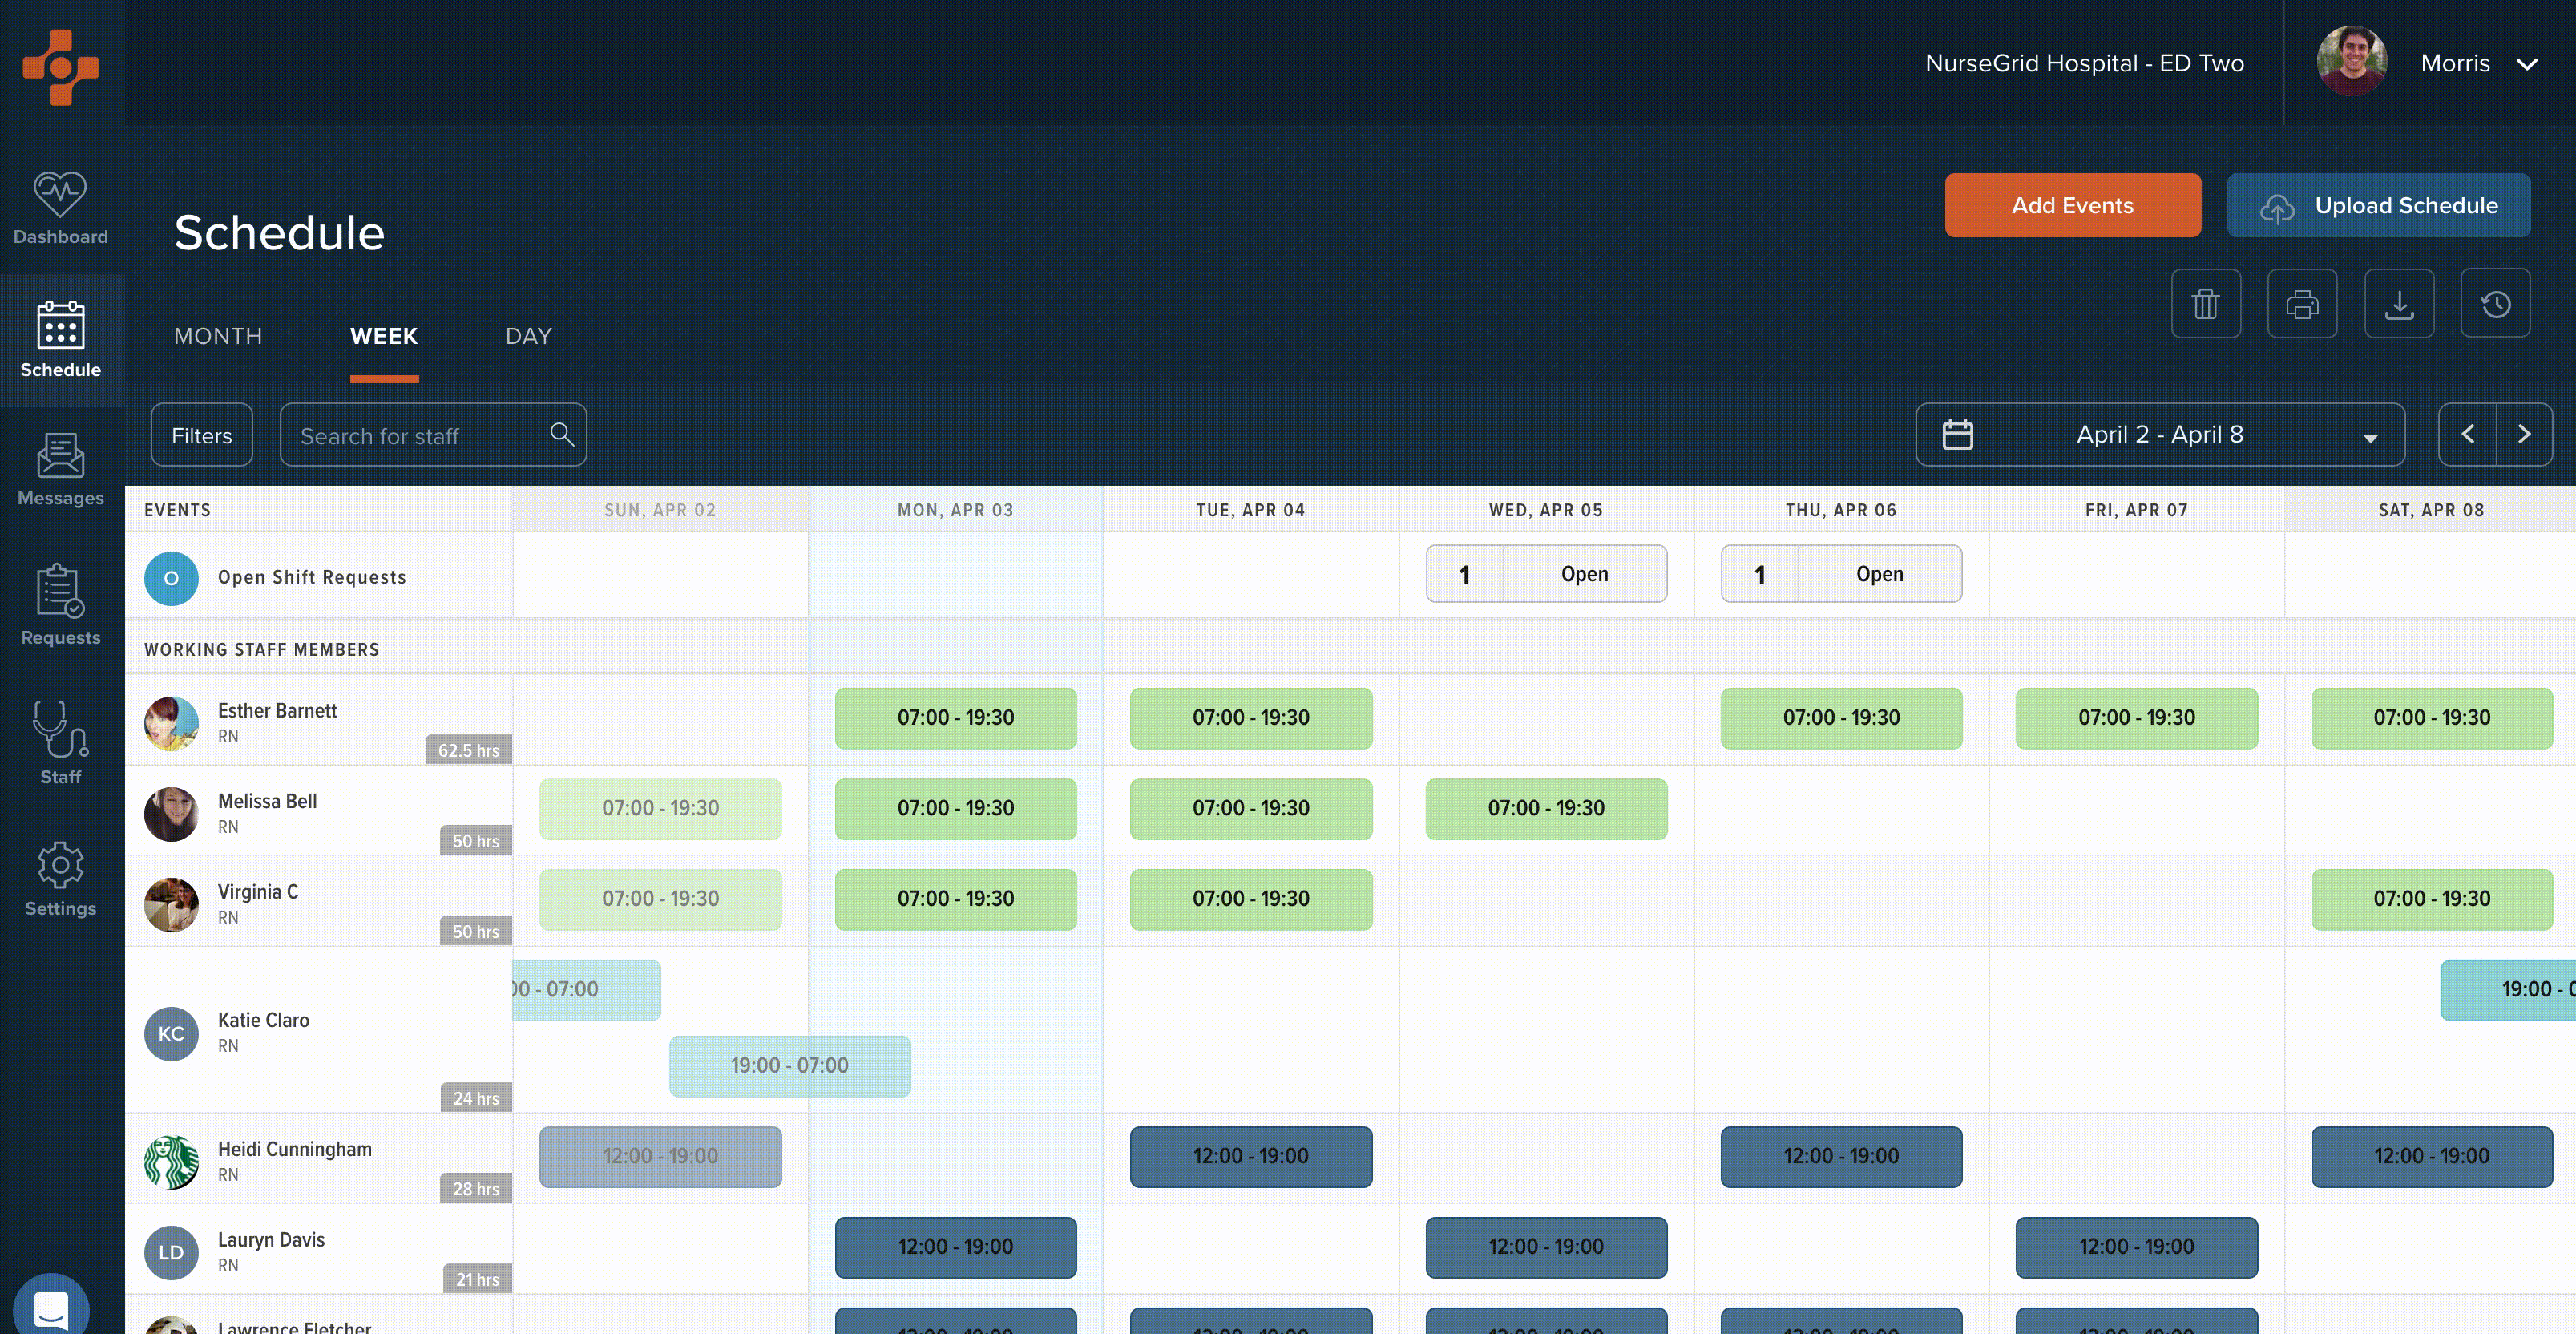
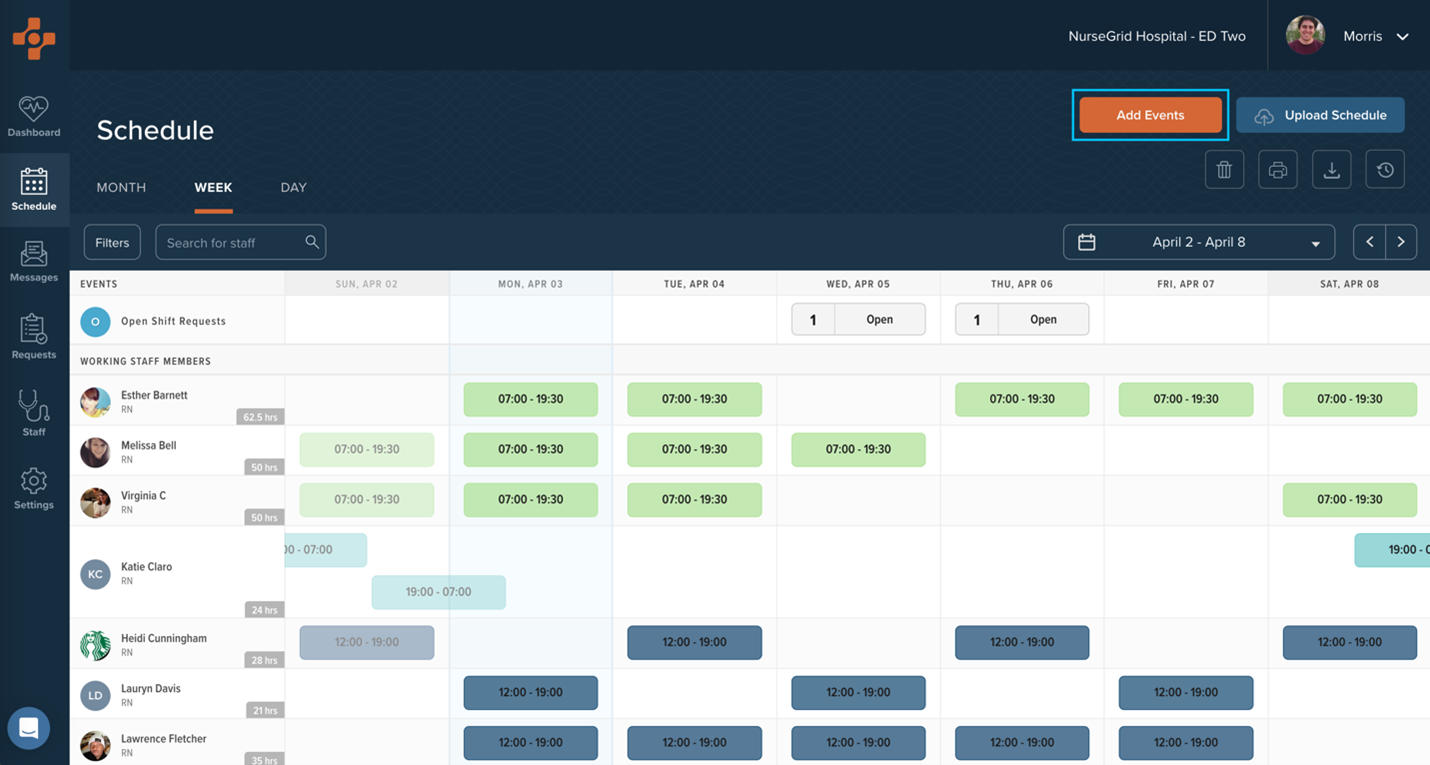
The Week view will give you schedule information in more detail with all of your team members listed and their schedules for the week. Again, the shifts are color coordinated to the Shift Types you made in your account settings.

From the Schedule section, you have the ability to create new shifts for your staff. To create a new shift for a staff member on a specific day in the Week view, click on the cell that corresponds to that staff member’s row and the column that corresponds to the desired day of the week. Alternatively, click the Add Events button in the top right-hand corner of any Schedule page.
The “Add New Events” screen will pop up where you can enter the details of the shift or event. First, click the date(s) that the shift will be for. Next, choose the event type from the drop-down menu that will list all of your custom shift types, meeting, education, vacation, and custom shift.
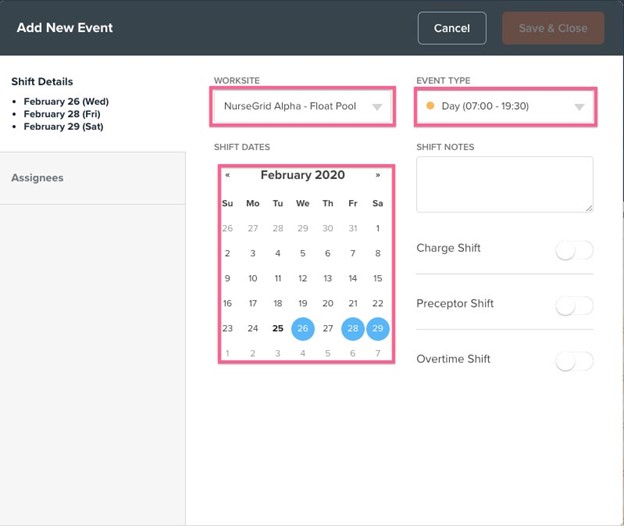
On the column on the right, you can choose whether it is a charge/preceptor/overtime shift (optional), and attach a note that will be visible to your assignee(s) (optional).
After the details are in place, you can click “Assignees” on the left-hand side of the Details modal to view the employees who are available on the date(s) you clicked. You have the option to invite all staff to the event, search for a specific colleague by name, and use the filters to adjust position type/credentials/tags/charge trained.
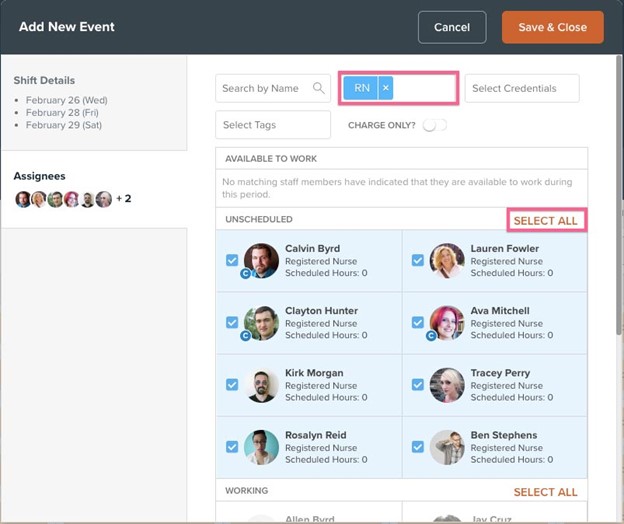
Note: There are three checklists of potential recipients:
- Available to Work (employees who have created an Available event on their calendar),
- Unscheduled (employees who are not already on shift), and
- Working (employees who are on shift for part or all of the timeframe you chose).
You can include any or all of the recipients in these three checklists if you’d like.
Once all of the details are set, click the orange Save & Close button to create the new shift (or shifts if you selected multiple dates and/or multiple staff members). You will see a loading screen, after which the window will Add New Event window will close and the Schedule screen will refresh. The event or shift(s) should now be live and sent out to your staff!
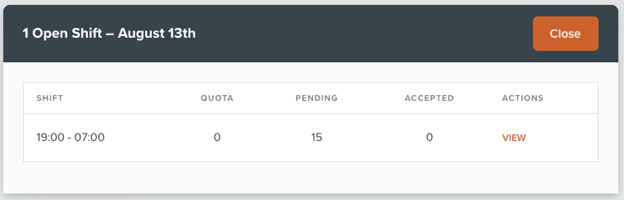
The number of current open Open Shift Requests now displays at the top of every day in Schedule Week view. Clicking on the Open Shift count for any day will bring up a screen displaying a summary of those open shift requests including time, pending and accepted responses. A badge icon will appear on any request that has pending actions. Each open shift should have a link taking you its details page by clicking “View” under the actions column.