
If you prefer to plan your department’s schedule on a different platform, adding your schedule to Nursegrid Manager is now simpler than ever. Schedule Upload will allow you to plug in an existing schedule and have your department’s shifts ready to publish through Nursegrid Manager in just a few simple steps.
Step 1 — Upload Your Spreadsheet
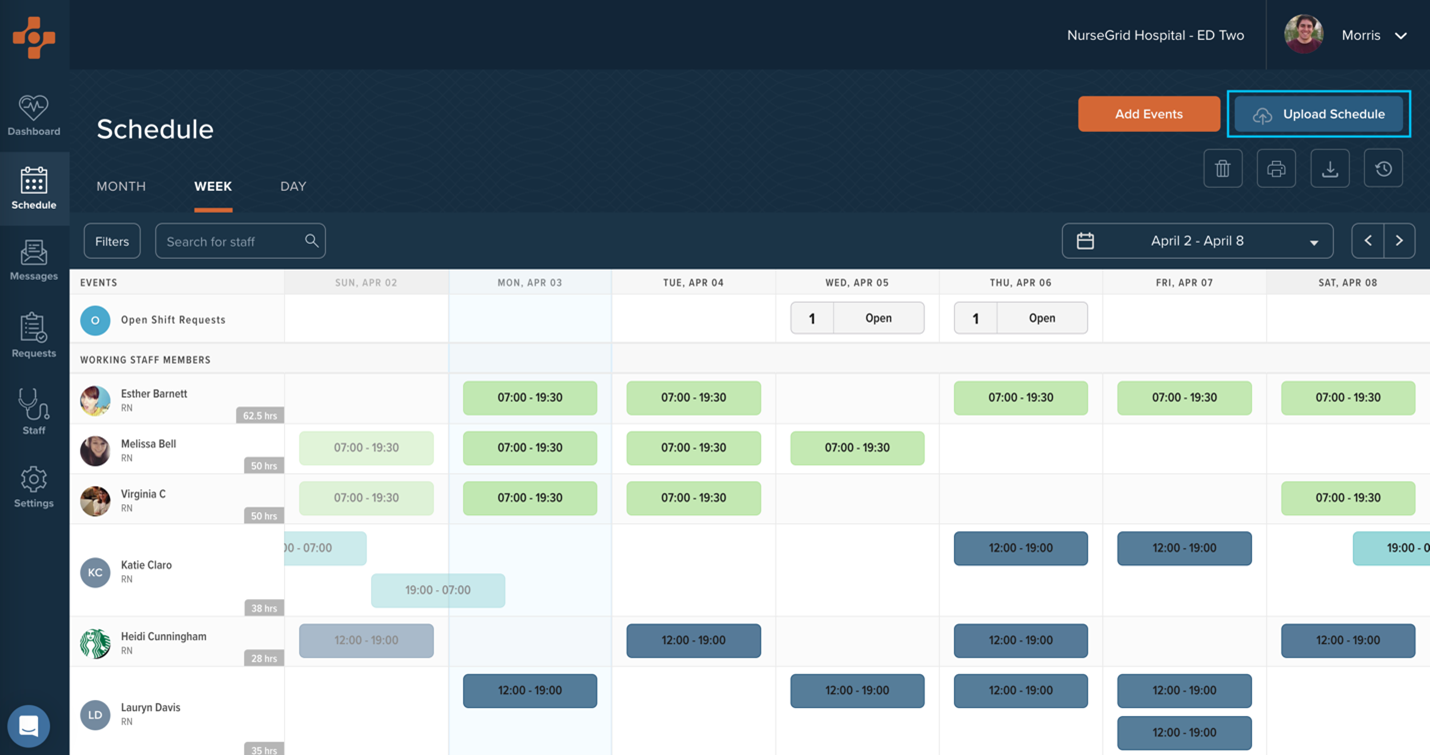
Starting the upload process is as simple as clicking the Upload Schedule button in the Schedule view, then selecting or dragging your file in Nursegrid Manager. However, before uploading your schedule, there are a few formatting specifics that you should know to optimize your experience:
- Your spreadsheet must be in CSV or Excel (.xls, .xlsx) format and must not exceed 5MB in size.
- The spreadsheet must contain a column with the names of your staff members, specifically in a first and last name format — for example: Doe, John or Doe, J. Staff names must be in columns 1 or 2. Exclude any use of parentheses in your spreadsheet, such as “Katharine (Katie) Smith.”
- Dates should be formatted as numbers only, with month first (i.e. MM/DD/YYYY).
- Nursegrid Manager’s upload engine will not be able to recognize any color coding your spreadsheet contains. Each shift type must be assigned a unique letter, number, or symbol. For instance, all day shifts should be signified as ‘D’ and all night shifts designated ‘N.’ No two shift types can share the same identifier. Do not use any special characters as shift designators.
- Nursegrid will only attempt to read the first tab of any spreadsheet. Make sure your schedule is on the very first tab of your Excel workbook when uploading to Nursegrid.
Here is an example spreadsheet with sample information.
If you’d like assistance with formatting, just send your schedule to our team and we’d be happy to help! Then, when your spreadsheet fits all of the above requirements, you can upload it on Nursegrid and proceed to the next step!
Step 2 — Match Your Staff Members and Shifts
After your schedule has been uploaded, you will be able to match the shifts and staff members from your spreadsheet to the shift types in your department and to the Nursegrid Mobile users that are in your staff directory. Once you have matched your staff members, events and shifts, the Nursegrid platform will learn your settings and save them for future uploads, reducing the time it takes you to get your schedule published to your staff members.
Staff members: The staff member section will appear in a column to the left of your scheduled events. In this column, you will be able to assign the names imported from your spreadsheet to staff members from your staff directory.
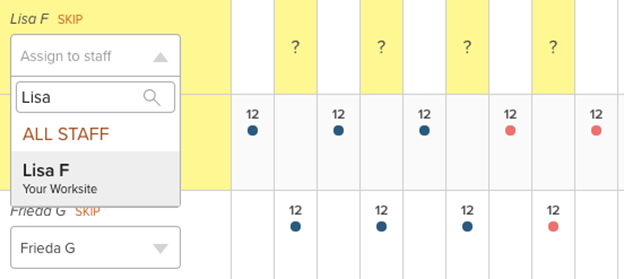
You also have the ability to skip or ignore assigning staff members. Skipping a staff member means the staff member that has been uploaded from the spreadsheet will not be assigned to a staff member from your directory in Nursegrid Manager at this time or included in the current upload.
Ignoring the staff member will exclude them and their shifts from appearing in current and future uploads. You might choose to ignore a staff member if they are on extended leave. Staff can be removed from the “ignore” list at any time, at which point they will be included in future uploads.
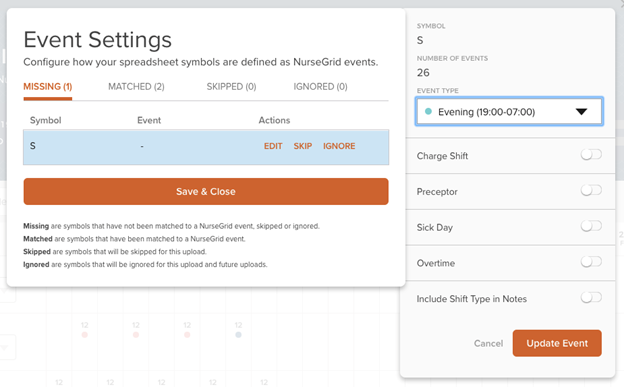
Events and shifts: When you first upload your schedule, you’ll need to match the unique shift identifiers from your spreadsheet to the shift types you’ve set up in Nursegrid.
Click on the Event Settings button to assign and edit the shift or event type for an unmatched shift. Match a symbol to a shift by clicking Edit and selecting the correct shift type for that symbol.
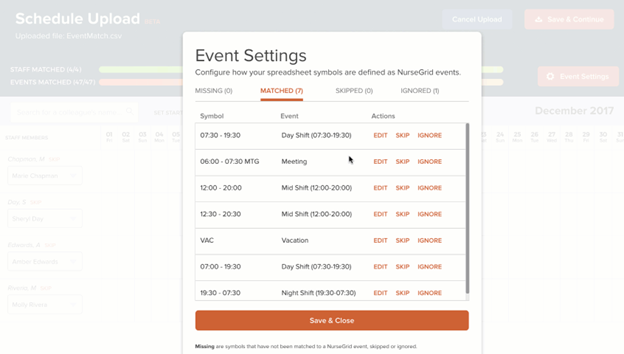
Nursegrid will remember your unique shift symbols in the future and automatically match them to the correct shift type going forward. Matched events and shifts will display with the same icons that appear on the drafted version of your schedule in Nursegrid Manager.
If there are shifts or events that don’t necessarily need to be symbolized on your schedule, or you would like to temporarily leave a shift or event off of your schedule, you can choose to skip or ignore symbol matching. Skipping symbol matching will skip the process on your current schedule upload. Ignoring symbol matching will skip the process on current and future uploads.
Step 3 — Confirm to Your Calendar
Now that your schedule has been uploaded and matched to your staff and department’s event settings, you are ready to confirm your schedule to your calendar. Clicking Save & Continue will create a new drafted schedule from your upload but will NOT publish your schedule. The newly uploaded and saved schedule will be a draft that you can add events to or edit prior to publishing.
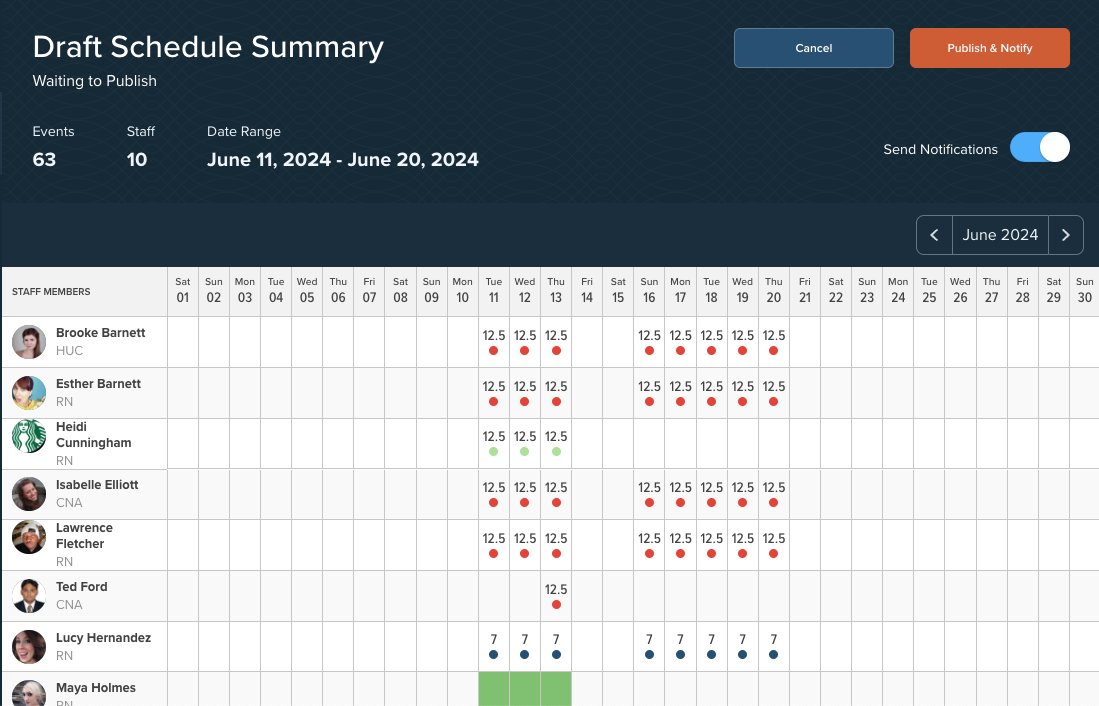
When you’re ready to send your schedule out to your staff, simply click Publish & Notify in the top-right corner. If you’d like staff to be notified that new shifts have been added to their schedule, make sure the Send Notifications box is checked. If it is not checked, staff will see new shifts on their calendar but not receive a push notification that those shifts were added.
